Integrating the CMS
Now that we know how to setup a feature in Vyuh, let’s see how we can integrate it with a CMS. We will be using Sanity.io 🔗 for this example, which is also our default supported CMS.
1. Setup the Sanity CMS
Section titled “1. Setup the Sanity CMS”Sanity is a headless CMS that allows you to define your own schemas and content types, entirely in code. This makes it easy to quickly build sophisticated schemas without wrestling with any Drag-n-Drop builders. It also sports a Studio which becomes the go-to UI tool for content editors. In this section, we will set up the studio and use the Vyuh Framework to build a simple blog schema and its corresponding widget.
Scaffold the project
Section titled “Scaffold the project”Set up a free Sanity project using the guides from Sanity.io 🔗 or use the command line shown below:
pnpm dlx create-sanity@latestWhile creating the sanity project, select the project template as
Clean project with no predefined schema types
A faster way to scaffold a Vyuh project would be with the 
Refer to the Vyuh CLI guide for more details.
An Aside on developing with a CMS 🤔
Section titled “An Aside on developing with a CMS 🤔”Vyuh is designed to be CMS-agnostic and allows a different style of building Apps where you give the control of content to the content-editors. This is a powerful way to build apps where the content is the king and the app is just a medium to display it.
Content is not limited to only the text and other visual blocks on a CMS but it can be your entire App Experience. This technique has been a key pillar in building large scale apps where the content and experience can be very dynamic.
In this regard, the CMS becomes your declarative, no-code tool where you focus on what content should be shown under what conditions and the Flutter App becomes the code that renders it. Every block that is available on the CMS has its counterpart in Flutter. It’s a different way of building apps and a throwback to Model-Driven Development.
What you get is a dynamic App that can be changed on the fly without an App Store release. It also allows greater exploration of the app experience and can be a great tool for A/B testing.
2. Configure the Studio
Section titled “2. Configure the Studio”Add the following dependencies to your package.json and run pnpm install .
These dependencies will help in the schema development with Sanity and Vyuh.
{ dependencies: { /* Other Dependencies */ '@vyuh/sanity-plugin-structure': '^1.16.2', '@vyuh/sanity-schema-core': '^1.16.2', '@vyuh/sanity-schema-system': '^1.16.2', },}Once installation is done, go to the sanity.config.ts file and update the
contents as below
import { defineConfig } from 'sanity'import { vyuh } from '@vyuh/sanity-plugin-structure'import { system } from '@vyuh/sanity-schema-system'
export default defineConfig([  {    name: 'default',    title: 'My Blog',    basePath: '/',
    projectId: '<Your Sanity Project ID>',    dataset: 'production',
plugins: [ vyuh({ features: [ system, // ... other features ... // ], }), ], },])vyuh({ features: [] }) is a sanity plugin that configures the studio.
- It takes an array of
FeatureDescriptors that represent the features of your application. EachFeatureDescriptorcontributes a set of content schemas that are available on the Studio. - It also includes the standard Sanity plugins such as the Structure, Vision and Media for simpler setup.
For more details on the Vyuh Structure plugin, refer to Structure Plugin
Now run the project, using pnpm dev

Your studio should look something like above with the standard document types of Route, Conditional Route, Category and Region.
3. Explore the Sanity Studio
Section titled “3. Explore the Sanity Studio”Let’s create a simple route for a blog post, with the path /blog. Add a region
on the route and call it body. Inside this region, add the Portable Text
block.


Now let’s create some text and format it to look like a real blog post. We can add a title, section-headings, paragraphs, and images to the post.

4. Create the feature on the Flutter side
Section titled “4. Create the feature on the Flutter side”Just like we had the FeatureDescriptor for setting up the schemas in Sanity,
we also have an equivalent FeatureDescriptor on the Flutter side that handles
the rendering of these schemas. Let’s set it up inside the feature.dart file.
In our application, we define each feature using a
FeatureDescriptor. A feature is treated as a self-contained, independent unit
within the app and can include various routes and content-extensions to handle
CMS content. It also has other metadata such as a name, title, icon, etc.
For every feature, we will create a dedicated feature.dart file, which
will contain the FeatureDescriptor.
import 'package:flutter/material.dart';import 'package:go_router/go_router.dart';import 'package:vyuh_core/vyuh_core.dart';import 'package:vyuh_feature_system/vyuh_feature_system.dart';
final feature = FeatureDescriptor(  name: 'blog',  title: 'My diary of travel blogs',  description: 'Chronicling my journeys across the world in my travel blog',  icon: Icons.pages,  routes: () async {    return [      GoRoute(        path: '/blog',        pageBuilder: defaultRoutePageBuilder,      ),    ];  },);
Note that the defaultRoutePageBuilder is a standard page-builder that knows
how to work with CMS routes. We are also declaring our starting blog entry in
the /blog route.
5. Setup the Vyuh app
Section titled “5. Setup the Vyuh app”We are now in the final leg of this journey, where we connect the content, feature and the app to see all of it in action.
We need to add few packages from the framework that allows rendering of the CMS content and also show a Developer View of the features. Run this command in your project directory:
flutter pub add vyuh_feature_system vyuh_feature_developer vyuh_plugin_content_provider_sanityNotice the reference to the Sanity Content Provider package. This is the key package that allows connecting to Sanity and fetching documents.
Now we add SanityContentProvider within the DefaultContentPlugin. This
creates the connection to the Sanity Studio we setup earlier and can fetch
content on demand.
import 'package:flutter/material.dart';import 'package:sanity_client/client.dart';import 'package:vyuh_core/vyuh_core.dart' as vc;import 'package:vyuh_extension_content/vyuh_extension_content.dart';import 'feature.dart' as blog;import 'package:vyuh_feature_system/vyuh_feature_system.dart' as system;import 'package:vyuh_feature_developer/vyuh_feature_developer.dart'    as developer;import 'package:vyuh_plugin_content_provider_sanity/vyuh_plugin_content_provider_sanity.dart';
void main() async {  WidgetsFlutterBinding.ensureInitialized();
vc.runApp( initialLocation: '/blog', features: () => [ system.feature, developer.feature, blog.feature, ], plugins: PluginDescriptor( content: DefaultContentPlugin( provider: SanityContentProvider( SanityClient( SanityConfig( dataset: 'your_dataset', projectId: 'your_project_id', token:'your_token', ), ), ), ) ), );}- We use the /blog as our
initialRouteto load it up as the starting page of our App. - The
project-idshould be the same as the one used earlier for the Studio setup - To get the token, visit the
Manageconsole of the Sanity Project and create a Read Token. The token is a security measure and ensures only validated requests are allowed by Sanity.

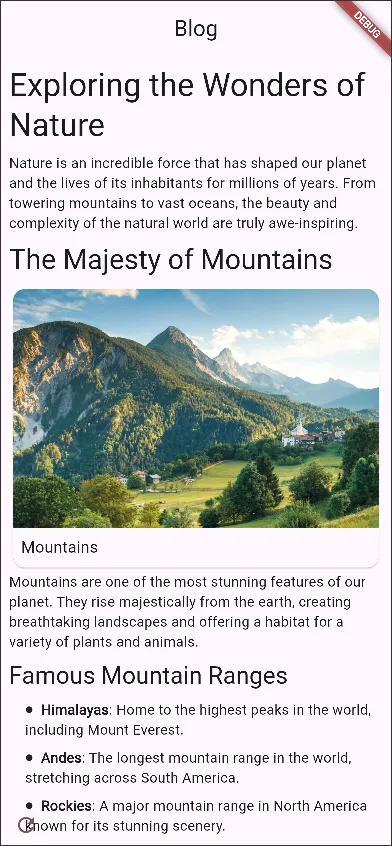
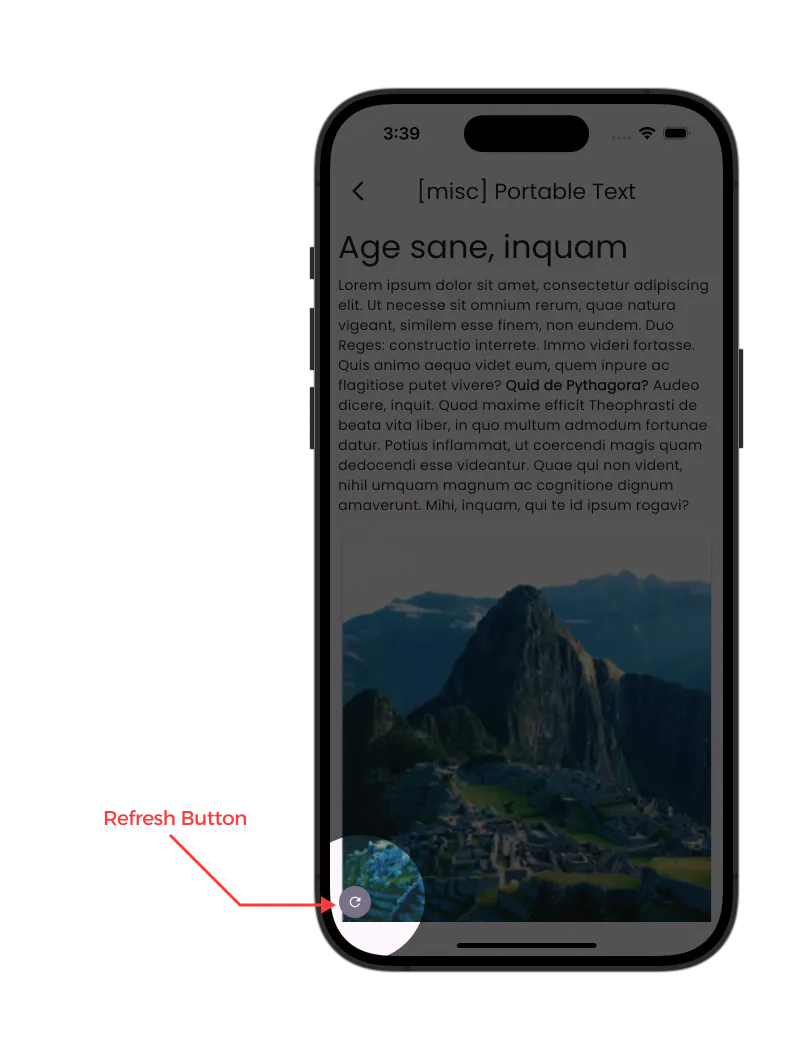
Now run the app and be ready to be greeted by our lovely blog. Play around in the Studio to add more text, images, and moving blocks around. If you hit the refresh icon at the bottom-left of the screen, you will see the content updates live on your App.

Running on the Web?
Section titled “Running on the Web?”If you are running on the Web, make sure to update the CORS Origins in
Sanity to include the port number you are using. In the previous screenshot of
the console, you will notice that we have used https://localhost:8080.
You will also have to pass the --web-port=8080 to ensure the Browser
launches on the correct port.
6. Enable Live Content Editing New
Section titled “6. Enable Live Content Editing ”One of the most powerful features of Vyuh is the ability to see content changes in real-time without having to restart your app or manually refresh. This feature, called Live Content Editing, significantly improves your development workflow.
How to Enable Live Routes
Section titled “How to Enable Live Routes”Enabling Live Content Editing is as simple as setting the useLiveRoute flag to
true on the DefaultContentPlugin. Here’s how you can modify your main.dart
file:
void main() async {  WidgetsFlutterBinding.ensureInitialized();
  vc.runApp(    initialLocation: '/blog',    features: () => [      system.feature,      developer.feature,      blog.feature,    ],    plugins: PluginDescriptor(      content: DefaultContentPlugin(        useLiveRoute: true, // Enable live routes        provider: SanityContentProvider(          SanityClient(            SanityConfig(              dataset: 'your_dataset',              projectId: 'your_project_id',              token:'your_token',              perspective: Perspective.previewDrafts, // To see draft content              useCdn: false, // Required for live updates            ),          ),        ),      )    ),  );}
Important Configuration Notes
Section titled “Important Configuration Notes”For Live Content Editing to work properly, make sure to:
- Set
useLiveRoute: trueon theDefaultContentPlugin - Set
perspective: Perspective.previewDraftsto see draft content before publishing - Set
useCdn: falseas we want to work with draft content - Provide a valid Sanity token with appropriate permissions. Without a valid token this will fail.
How It Works
Section titled “How It Works”Behind the scenes, Vyuh leverages Sanity’s Live Content API to establish a real-time connection between your app and the CMS. When content changes are made in the Sanity Studio, the API sends those changes to your app, which then updates the UI accordingly.
This works in both development and production environments. In production, you would typically need to publish your content before it appears on customer devices, unless you specifically configure your app to show draft content.
In development, it’s useful to see draft content immediately using
Perspective.previewDrafts.
For production apps, you might want to switch to Perspective.published to
ensure only published content is visible to users.
Manual Route Refreshing
Section titled “Manual Route Refreshing”In addition to live updates, Vyuh also provides a way to manually refresh routes
through the allowRouteRefresh parameter. This is useful when you want to give
users the ability to pull-to-refresh content or when you need a refresh button
in your UI.
void main() async {  WidgetsFlutterBinding.ensureInitialized();
  vc.runApp(    initialLocation: '/blog',    features: () => [      system.feature,      developer.feature,      blog.feature,    ],    plugins: PluginDescriptor(      content: DefaultContentPlugin(        useLiveRoute: true,        allowRouteRefresh: true, // Enable manual refreshing        provider: SanityContentProvider(          SanityClient(            SanityConfig(              dataset: 'your_dataset',              projectId: 'your_project_id',              token:'your_token',              perspective: Perspective.previewDrafts,              useCdn: false,            ),          ),        ),      )    ),  );}
This parameter works with both live routes and static routes, giving you flexibility in how content updates are handled in your application.
Even when useLiveRoute is enabled, manual refreshing can still be useful in
certain scenarios, such as when you want to force an immediate refresh rather
than waiting for the next live update.
Summary
Section titled “Summary”This guide gave you a quick way of creating content on Sanity and seeing it live on the Device Simulator. With the power of the Vyuh Framework, you can make changes on Sanity and have it rendered in real-time.
Try exploring other Content types such as Cards, Groups, and playing around with Actions and Conditions. This is just the beginning and there is lot you can do with custom content and the Vyuh Framework. We will explore more in other guides.

