Actions
Actions are a great way to build interactivity within your applications (see the Glossary for a formal definition). Vyuh has several built-in actions that you can start with. However, you will eventually want to create your own and have something more relevant for your application. In this guide, we will focus on creating a custom action from scratch.
Built-in Actions
Before creating your own action, check the ones already available out of the box in Vyuh:
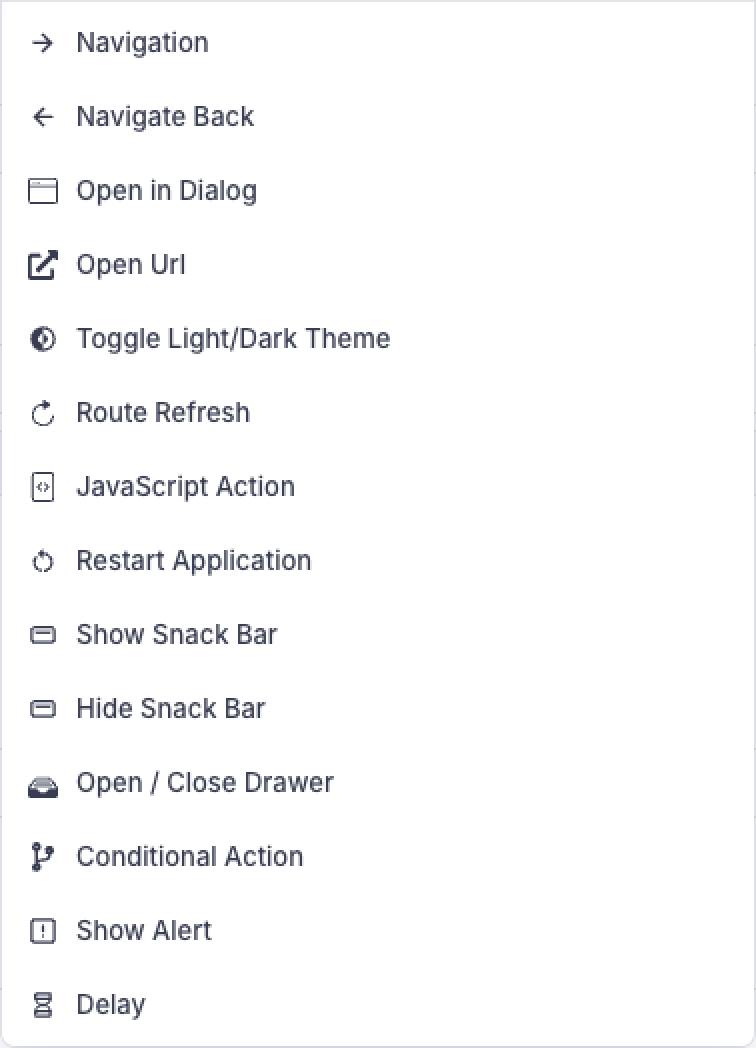
- Navigation
- Navigate Back
- Open in Dialog
- Open URL
- Toggle Theme
- Show / Hide Snack Bar
- Open / Close Drawer
- Show Alert
- Delay
- Refresh Route
- Restart Application
Conditional Action
An interesting one is the Conditional Action that allows you to branch between two or more actions based on some runtime condition. See the Conditions guide for details on defining and using conditions.
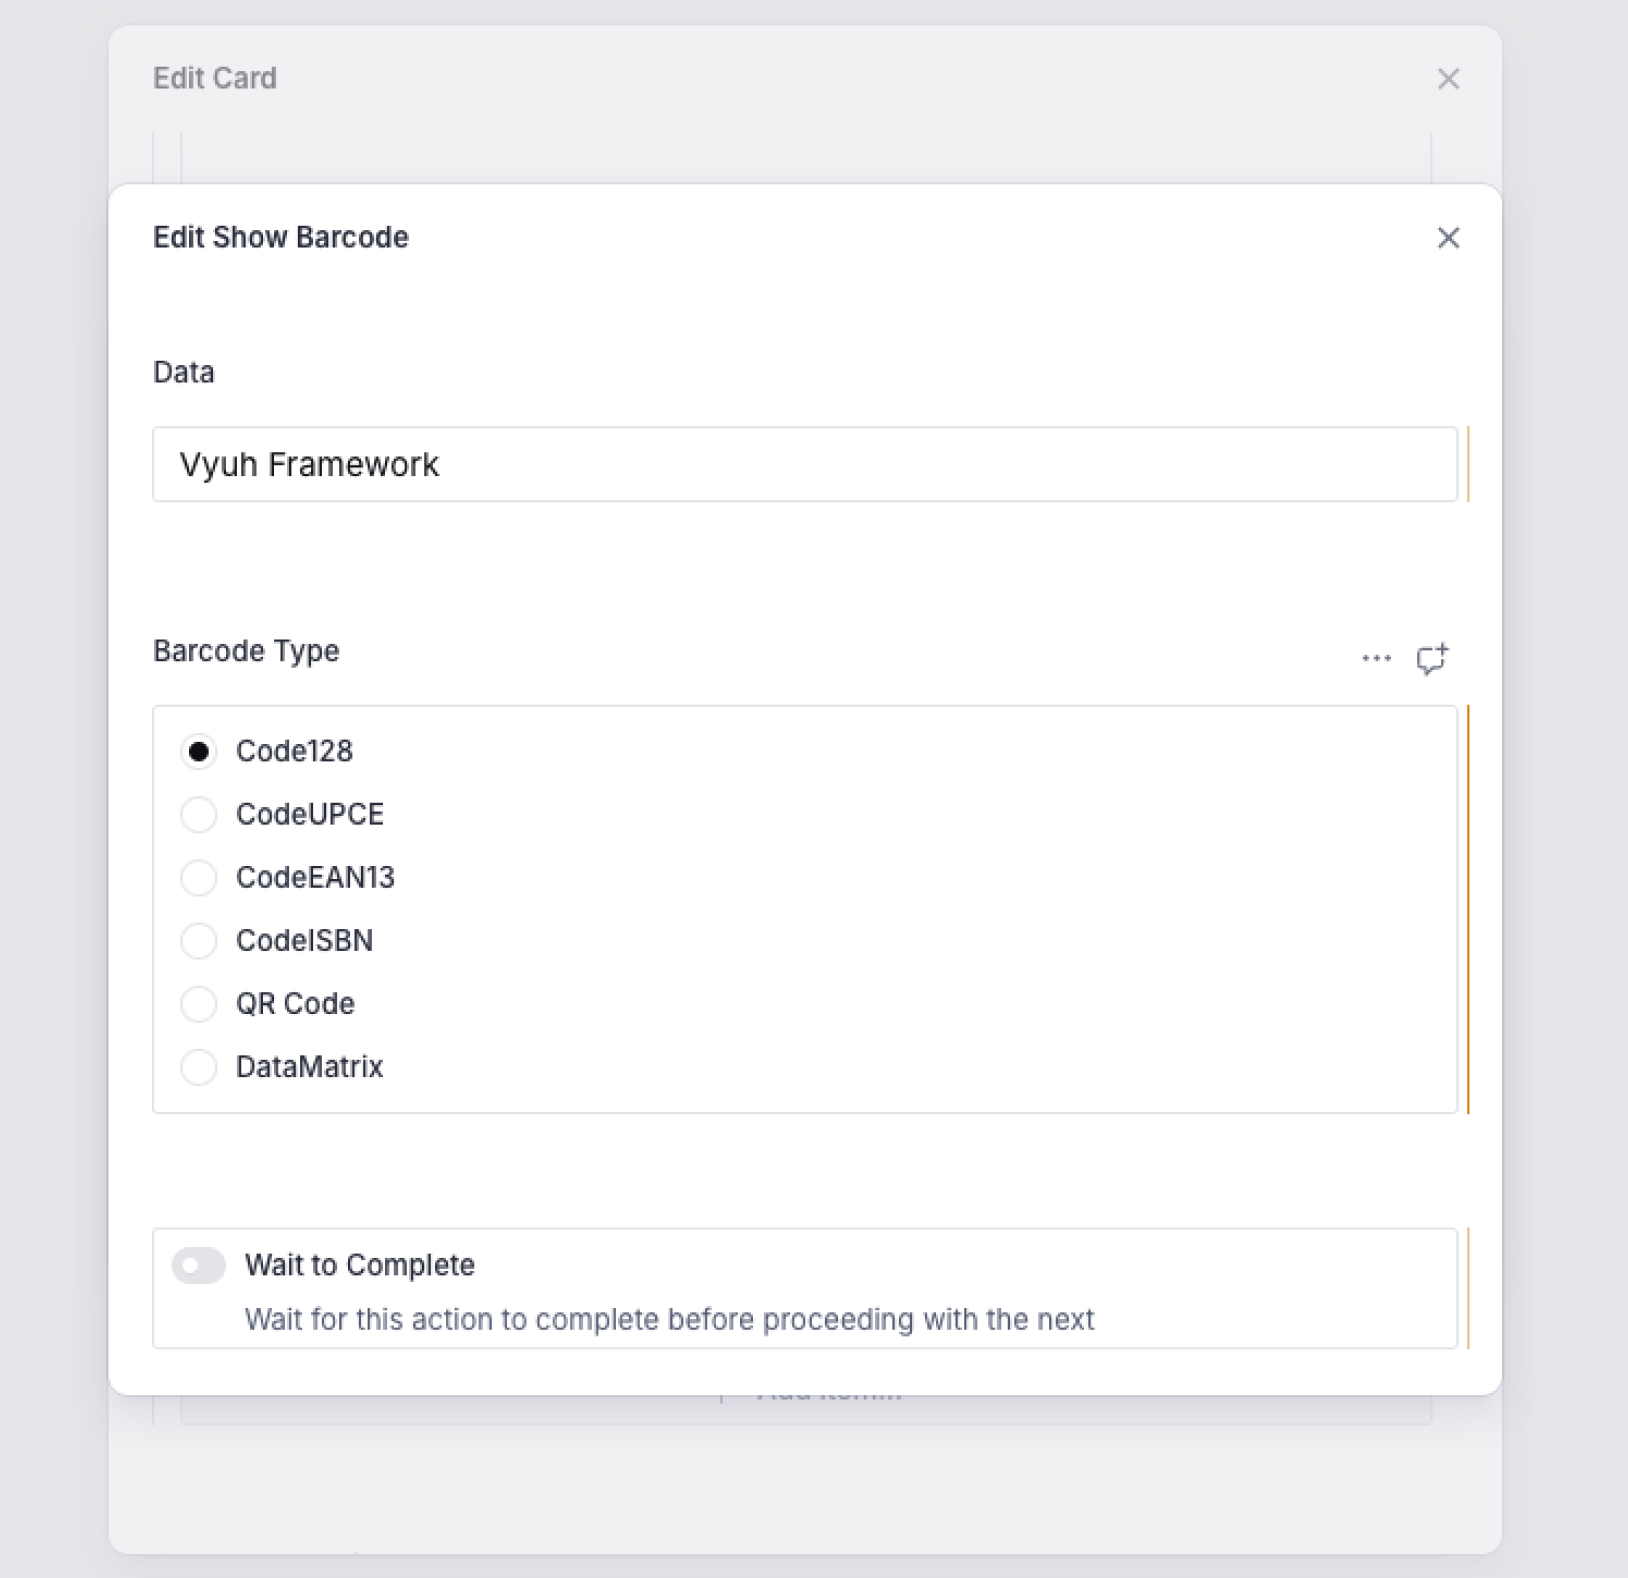
A Custom "Show Barcode" Action
Let us create a custom action that shows a barcode to the user. This could be useful in a store app where you use the barcode for scanning and retrieving useful information such as availability, offers, and prices.
Schema for the Barcode Action
Barcodes encode text, making it easier for barcode scanners to quickly read information. Barcodes can be encoded in multiple formats. We need data and barcodeType as our two primary parameters.
Here is the Sanity schema:
import { defineField, defineType } from 'sanity'
import { FaBarcode as Icon } from 'react-icons/fa6'

export const showBarcode = defineType({
  name: 'misc.action.showBarcode',
  title: 'Show Barcode',
  type: 'object',
  icon: Icon,
  fields: [
    defineField({
      name: 'data',
      title: 'Data',
      type: 'string',
      initialValue: 'Vyuh Framework',
      validation: (Rule) => Rule.required(),
    }),
    defineField({
      name: 'barcodeType',
      title: 'Barcode Type',
      type: 'string',
      validation: (Rule) => Rule.required(),
      initialValue: 'Code128',
      options: {
        list: [
          { title: 'Code128', value: 'Code128' },
          { title: 'QR Code', value: 'QrCode' },
          { title: 'DataMatrix', value: 'DataMatrix' },
        ],
        layout: 'radio',
      },
    }),
  ],
  preview: {
    select: {
      barcodeType: 'barcodeType',
      data: 'data',
    },
    prepare({ barcodeType, data }) {
      return {
        title: 'Show Barcode',
        subtitle: `Data: ${data ?? '---'} | Barcode Type: ${barcodeType}`,
      }
    },
  },
})
It is a good practice to namespace your actions within your feature to avoid name collisions with other features.
Include in the CMS Feature
Add this action to the FeatureDescriptor:
import { FeatureDescriptor } from '@vyuh/sanity-schema-core'
import { showBarcode } from './action/show-barcode.ts'

export const misc = new FeatureDescriptor({
  name: 'misc',
  title: 'Miscellaneous',
  actions: [showBarcode],
  // ... rest of the definitions ...
})
Configuring the Action inside Sanity Studio
Now, its time to configure it inside the Studio. We will create a built-in Card which will invoke the action when tapped.
Flutter Counterpart for the Action
The executable version of an action needs to extend the ActionConfiguration class. Since we have set up the schema on the CMS, this counterpart will be a Dart class that maps the parameters accordingly:
import 'dart:async';

import 'package:barcode_widget/barcode_widget.dart';
import 'package:flutter/material.dart';
import 'package:json_annotation/json_annotation.dart';
import 'package:vyuh_core/vyuh_core.dart';
import 'package:vyuh_extension_content/vyuh_extension_content.dart';

part 'show_barcode.g.dart';

@JsonSerializable()
final class ShowBarcodeAction extends ActionConfiguration {
  static const schemaName = 'misc.action.showBarcode';

  static final typeDescriptor = TypeDescriptor(
    schemaType: schemaName,
    title: 'Show Barcode',
    fromJson: ShowBarcodeAction.fromJson,
  );

  final BarcodeType barcodeType;
  final String data;

  ShowBarcodeAction({
    super.isAwaited,
    this.barcodeType = BarcodeType.Code128,
    this.data = 'Vyuh Framework',
  }) : super(schemaType: schemaName, title: 'Show Bar Code');

  factory ShowBarcodeAction.fromJson(Map<String, dynamic> json) =>
      _$ShowBarcodeActionFromJson(json);

  @override
  FutureOr<void> execute(
    BuildContext context, {
    Map<String, dynamic>? arguments,
  }) {
    return showDialog(
      context: context,
      builder: (context) => AlertDialog(
        icon: const Icon(Icons.barcode_reader),
        title: Text('Barcode: ${barcodeType.name}'),
        content: BarcodeWidget(
          barcode: Barcode.fromType(barcodeType),
          data: data,
          height: 100,
        ),
      ),
    );
  }
}
Code Generation
The show_barcode.g.dart file is generated by json_serializable. Run the following command in your feature package whenever you add or change a @JsonSerializable class:
dart run build_runner buildThe barcodeType and the data fields map exactly to the ones in the CMS schema.
Including in the Flutter FeatureDescriptor
final feature = FeatureDescriptor(
  name: 'misc',
  title: 'Misc',
  icon: Icons.miscellaneous_services_outlined,
  routes: () async {
    return [
      CMSRoute(
        path: '/misc',
        routes: [
          CMSRoute(path: ':path(.*)'),
        ],
      ),
    ];
  },
  extensions: [
    ContentExtensionDescriptor(
      actions: [
        ShowBarcodeAction.typeDescriptor,
      ],
    ),
  ],
);
Ensure Feature is Included with the App
Make sure the feature is included in your app's runApp() call, otherwise it would fail at runtime to recognize the action from the CMS payload:
import 'package:feature_misc/feature_misc.dart' as misc;
import 'package:vyuh_core/vyuh_core.dart' as vc;

void main() async {
  vc.runApp(
    initialLocation: '/demo',
    features: () => [
      system.feature,
      misc.feature,
    ],
    plugins: plugins,
  );
}
Summary
In this guide we have seen how to create a custom action where we create the schema, its Flutter counterpart, and register it with the FeatureDescriptor.
Custom actions can also be used to work directly with your internal client state, make network calls, and do other useful things that are relevant to your app. They are a powerful way of configuring actions directly from the CMS.
Related
- Glossary -- definitions of Action and other framework terms
- Conditions -- define conditions used by Conditional Actions