Set Up Sanity CMS
This guide walks you through setting up Sanity.io as your headless CMS for Vyuh React applications. Sanity provides a flexible content platform that works seamlessly with Vyuh’s content-driven approach.
Why Sanity?
Section titled “Why Sanity?”Vyuh works well with Sanity because:
- Schema as code: Define your content models in TypeScript rather than a GUI
- Customizable Studio: Tailor the editing experience for content creators
- Real-time updates: Content changes appear instantly in your app
- Powerful query language: GROQ lets you fetch exactly the data you need
1. Create a Sanity project
Section titled “1. Create a Sanity project”If you’re using the Vyuh React Workspace template repository, you’ll need to
create a Sanity project inside the apps/studio folder:
# Navigate to the studio foldercd apps/studio
# Initialize a new Sanity projectpnpx sanity@latest init
During setup:
- Choose “Create a new project”
- Give your project a name
- Use the default dataset configuration
- Select “Clean project with no predefined schemas” as your template
2. Install Vyuh Sanity packages and configure your project
Section titled “2. Install Vyuh Sanity packages and configure your project”If you’re using the Vyuh React Workspace template, the miscellaneous feature is
already included. You’ll need to install the Vyuh Sanity packages and update
your sanity.config.ts file:
# Navigate to your Sanity project directory (if not already there)cd apps/studio
# Install Vyuh Sanity packagespnpm add @vyuh/sanity-plugin-structure @vyuh/sanity-schema-core @vyuh/sanity-schema-system
# Add the miscellaneous schema package as a workspace dependency (it's already in the workspace)pnpm add sanity-schema-misc
Then update your sanity.config.ts file to use the Vyuh structure plugin and
include the miscellaneous feature:
import { defineConfig } from 'sanity'import { vyuh } from '@vyuh/sanity-plugin-structure'import { system } from '@vyuh/sanity-schema-system'import { misc } from 'sanity-schema-misc' // Import the miscellaneous feature
export default defineConfig({  name: 'default',  title: 'Your Project Name',
  projectId: '<your-project-id>', // Replace with your projectId from sanity.cli.ts  dataset: 'production',
  plugins: [    vyuh({      features: [        system,        misc, // The miscellaneous feature from the template      ],    }),  ],})
Replace
<your-project-id>with your actual Sanity project ID fromsanity.cli.ts. You can also give a nice title to your project, while you are at it.
3. Start your Sanity Studio
Section titled “3. Start your Sanity Studio”Run your Sanity Studio to see your schemas in action:
cd apps/studiopnpm run devYour Sanity Studio should now be running at http://localhost:3333 with
your schemas available.
4. Configure API access
Section titled “4. Configure API access”To connect your Next.js app to Sanity, you’ll need to configure API access:
- Go to manage.sanity.io 🔗
- Select your project
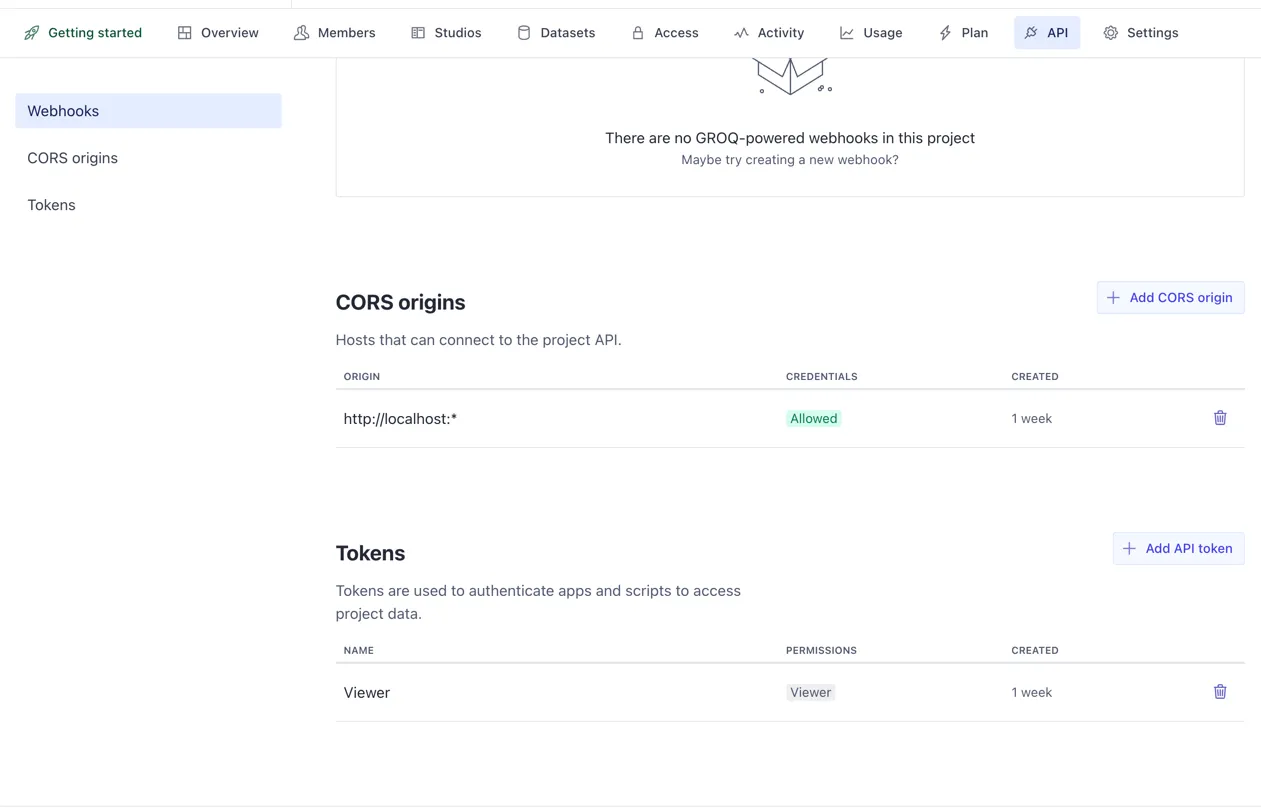
- Navigate to API > Tokens
- Create a new token with “Viewer” permissions for your frontend
- Save this token securely - you’ll need it for your React app
Configure CORS origins
Section titled “Configure CORS origins”You also need to configure CORS to allow your Next.js app to access the Sanity API:
- In the Sanity management console, go to API > CORS origins
- Click “Add CORS origin”
- Enter
http://localhost:* - Check “Allow credentials” if you need authenticated requests
- Save the configuration
5. Configure Environment Variables for Next.js
Section titled “5. Configure Environment Variables for Next.js”In your Next.js app, set the following environment variables in your
.env.local file:
NEXT_PUBLIC_SANITY_PROJECT_ID=<your-project-id>NEXT_PUBLIC_SANITY_DATASET=productionNEXT_PUBLIC_SANITY_TOKEN=<your-token>Next Steps
Section titled “Next Steps”Now that you have Sanity set up with your schemas, you’re ready to:
- Create some sample content in your Sanity Studio
- Connect your Next.js app to Sanity using the Vyuh content provider
- Render your content in your React application
Continue to Rendering Content with Vyuh React to learn how to display your Sanity content in your React app.