Your First Route
After setting up Sanity CMS for your Vyuh React application, the next step is to create your first route. Routes in Vyuh are the foundation of your application’s content structure, defining pages and their content organization.
Make sure you’ve completed the Set Up Sanity CMS guide before proceeding.
Understanding Routes in Vyuh
Section titled “Understanding Routes in Vyuh”In Vyuh, a route represents a page in your application. Each route:
- Has a unique path (like
/homeor/about) - Contains regions that organize content
- Can have different layouts
- Holds various content elements like cards, rich-text blocks, and more
Creating Your First Route
Section titled “Creating Your First Route”-
Open your Sanity Studio
Navigate to your Sanity Studio (typically running at http://localhost:3333 🔗) and log in.
-
Create a new Route document
In the Sanity Studio sidebar, find the “Content” section and click on “Route”. Then click the “Create new” button.
-
Configure the Route
Fill in the basic route information:
- Title: Give your route a descriptive name (e.g., “Home Page”)
- Path: Set the URL path for this route (e.g.,
/home)
-
Add a Region
Regions are containers that organize content within your route. Let’s add a “body” region:
- Click the “Add item” button to add a Region
- Choose ”+ Create” to create a new Region. This will open up a new panel.
- Set the identifier to “body” and the title to “Body”
- Click “Publish” to create the region
-
Add Content to the Region
Now let’s add a simple card to our body region:
- Click the “Add Item” button in the body region
- Select “Card” from the content types
- Fill in the card details:
- Title: “Hello World”
- Description: “My first Vyuh content element”
Watch the Process
Section titled “Watch the Process”Here’s a video demonstration of creating your first route in Sanity:
Viewing Your Route in Next.js
Section titled “Viewing Your Route in Next.js”Now that you’ve created and published your first route, you can view it in your
Next.js application using the RouteLoader component:
// In your root page.tsximport { RouteLoader } from '@vyuh/react-extension-content'
function HomePage() {  return <RouteLoader path="/home" live={true} />}
The live={true} property enables real-time updates, so any changes you make in
Sanity Studio will immediately appear in your React application.
Make sure your React application is properly configured with the Vyuh provider and content plugin as described in the Rendering Content guide.
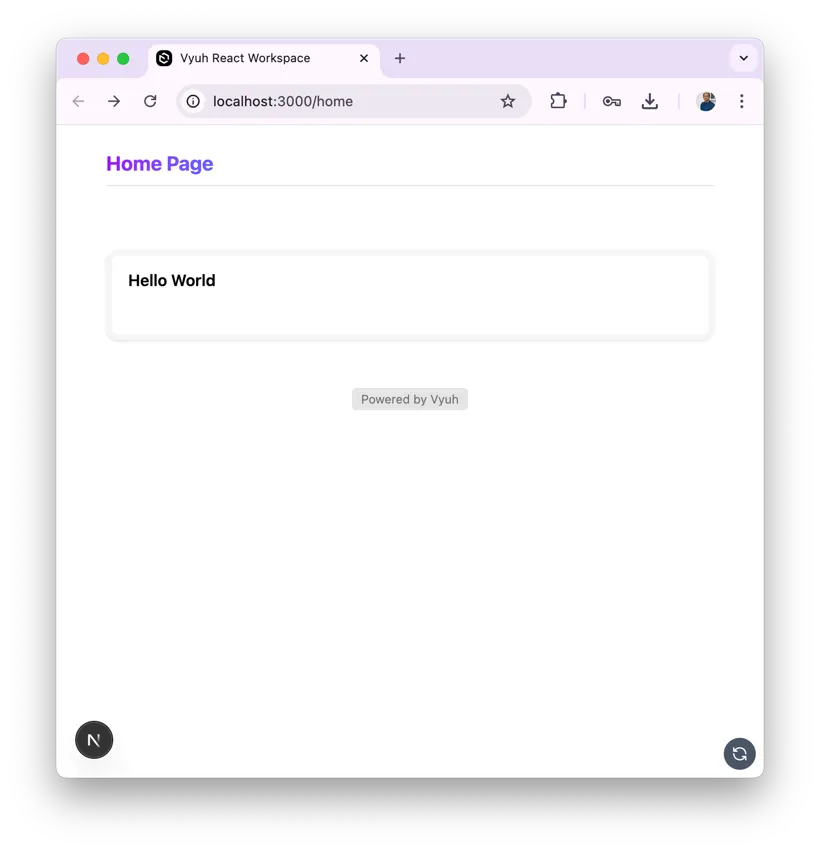
If you created the repo using the template workspace
that we linked to earlier, then you can just go to the /home path on your
address bar, and you should see the page.

Next Steps
Section titled “Next Steps”Now that you’ve created your first route, you can:
- Add more regions to organize your content
- Experiment with different content types like portable-text, images, and groups
- Try different layouts for your route
- Create additional routes for other pages in your application
Continue to Rendering Content with Vyuh React to learn more about displaying your Sanity content in your React application.

